
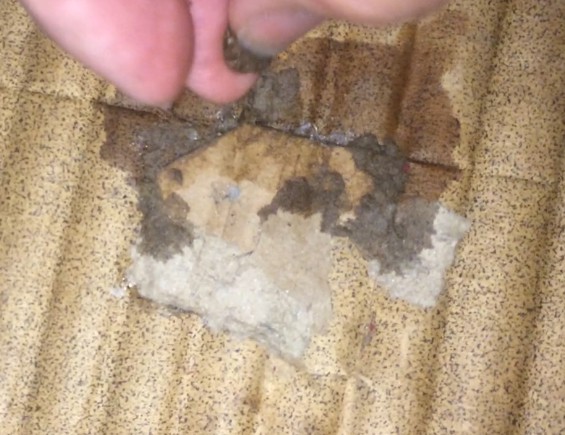
The original headliner in the AMX is a cardboard, plastic foam and plastic coated pressed and cut composite. Problem, over the years in storage squirrels got in – probably through the trunk – and built a nest between the headliner and the roof of the car. They pushed it away from the original location – glued to carpet padding which was in turn glued to the roof. They then peed on it and chewed a couple of holes in it – the largest about 1 1/2″ in diameter.
My options were to try to find a replacement – new OEM do not exist and new repro – none I could find. Used in good shape – not likely, not I found anyway. Make a new one or have an upholstery shop make one – unlikely to find a shop who could or would do an exact copy and even a different look would be expensive. So- repair?
I removed it carefully so as not to damage it further, cleaned the urine stained areas and removed the carpet padding (the squirrels had chewed it pretty well too).
On the finished side of the headliner, the plastic textured coating had pealed because of the squirrel damage, so I carefully removed it all.

At this point I decided a paper mache repair to the holes would work best – I first cut a cardboard patch to plug the largest hole, glued it in place with good old Elmers Glue. Backed it up with masking tape to dry.
I then took some shredded cardboard (from the recycling) and mixed it with some water and more Elmers. I smeared this mixture onto the patched hole and into the smaller holes and tears. I made sure to build it above the surrounding surface. When it was dry I sanded it to match the contours of the original.
To eliminate the distortion in the sagging part, I sprayed the back of the cardboard composite with water and then used weight and masking tape and blocks of wood to hold it in shape while it dried.
I did a trial fitting and it seemed the structural repairs were good to go, so what was next was recreating the finished texture. That texture was a random side to side series of small ridges. I used a paint brush and regular contact cement careful to only brush side to side matching the original pattern. A couple coats of this gave me the texture I needed but also reinforced the surface to a more durable surface than the original (I recall having made some of the smaller holes and scrapes by bumping things into it loading stuff).
I used a black Rustoleum paint to finish the interior surface.
Next I bought a small piece of foam rubber carpet pad (seemed to be what the manufacturer used to begin with)> using contact cement I attached pieces the same size and location as new.
The final step was to use the same Liquid Nails adhesive to attach the headliner to the car. I had to use a combination of cargo straps, packing blankets and other props to hold it tight to the roof while it dried.
AND BOB’S YOUR UNCLE!